By Charlie Joey Hadley | January 30, 2018
Citable Author
Charlie Joey Hadley
( orcid.org/0000-0002-3039-6849)
Citable Data
No data used.
 .Rmd on GitHub
After a long time coming, I’ve finally got round to picking a workable solution for creating my data blog “Visible Data”. This is a short overview of how I picked my tools and my intentions for the website.
I had three core requirements which are covered in detail below, and reproducible steps are provided at the bottom
- I could write the blog in RMarkdown
- I could easily include
htmlwidgetsin blogposts (and elsewhere) - I could use Bootstrap grids wherever I fancied (I’m obsessed with responsive grids)
I’m going to use this blog for the following:
- Document me learning more R and datascience subjects
- Exploring interesting datasets
- Covering topics in reproducabiity and open science
RMarkdown
Previously I made use of Dean Attali’s awesome Beautiful Jekyll theme for creating a static website website hosted on GitHub Pages. I’d thoroughly recommend this for creating a very quick website where you don’t need RMarkdown because GitHub’s Jekyll builder doesn’t support it at all.
There are a few websites I contribute to that still use Beautiful Jekyll, including the excellent Reproducible Research Oxford Project which runs Software Carpentry training courses to encourage reproducible research methodologies.
The simplest solution for creating a blog which allows us to write content in RMarkdown is the excellent blogdown package, which is thoroughly introduced in Yihui Xie et al’s freely available book blogdown: Creating Websites with R Markdown.
htmlwidgets
If you’ve never heard of them, htmlwidgets are an amazing part of the work that RStudio have undertaken to make R a beautiful tool for doing data science and communicating things about your data.
htmlwidgets is a tool for R developers that allows them to easily build R wrappers for JavaScript libraries, which means useRs can build interactive visualisations like the interactive choropleth embedded here using leaflet.
Fantastically, htmlwidgets are supported natively by blogdown.
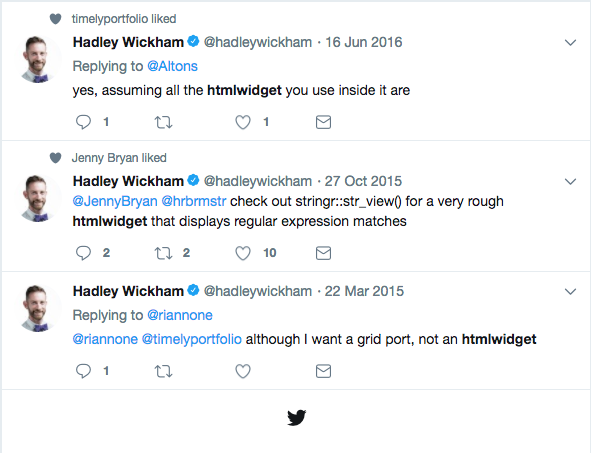
However, there’s not actually that much love for htmlwidgets or promotion of them!. For example, if you search through @hadleywickham’s tweets from January 2018 to the dawn of Twitter, htmlwidgets were only mentioned three times! I’ve blogged about where’s the love for htmlwidgets and produced a 5h+ training course on building interactive dataviz with htlmlwidgets for Lynda.com
Bootstrap grids
Boostrap is a framework for building responsive websites - these are websites that reflow content as the browser window changes. Bootstrap is very popular and used all over the web, it’s also how shiny apps are laid out.
The Hugo theme I used for this blogdown website uses Bootstrap which means (for instance) the navigation menu gets collapsed in narrow browser windows. But I can also use elements of Bootstrap wherever I want in blogposts/pages of the site by writing HTML in my .Rmd files, for instance in the section about htmlwidgets above you’d have seen the choropleth either to the right or below of the first three paragraphs dependent on your browser window size.
The thing about RMarkdown is that it really wants content to be rendered according to the rules of RMarkdown, which can be a problem with lots of nested HTML. Thankfully, there’s a little know feature introduced in RMarkdown v2 that allows us to turn off markdown processing1:
    <!--html_preserve-->
        <strong>This will render as HTML not preformatted text</strong>
    <!--/html_preserve-->
I get carried away with laying things out though, but it’s really fun playing with CSS!
Replicate this site
This website uses the wonderful Hugo Universal Theme and was built using the following steps (a slightly tailored version of the workflow in Yihui’s book, do read the book)
- Create a new RStudio Project (if you’re not using RStudio projects, you really should be)
- Initialise a git repo with
usethis::usethis::use_git() - Run
blogdown::new_site(theme = 'devcows/hugo-universal-theme') - In the
config.tomlfile make the following changes:baseurl = "/"relativeurls = true- Comment out the Google Maps API token
- Change the navigation tree as you see fit, you can duplicate mine here
- Add
public/to your.gitignorefile - Push your changes to GitHub (there’s lots of advice on alternatives in blogdown book)
- Sign up for a Netlify account and link your GitHub repo to Netlify, with these settings on this page [https://app.netlify.com/sites/visibledata/settings/deploys](https://app.netlify.com/sites/visibledata/settings/deploys:
Build commad: hugoPublish directory: public- The blogdown book says to use version 0.2 but don’t! Instead go to the Hugo news page https://gohugo.io/news/ and find the most recent version number and add
HUGO_VERSION: X.Xto the “Build environment variables” section
- Your site should now build :) But we still need to enable Disqus comments!
- Create a Disqus account and then find the quite well buried link “to install Disqus on my site”
- Choose a name for the site which will become your “Disqus Shortname” which we need to add to our
config.tomlfile:- disqusShortname = “your-short-name”
- Navigate to
layouts/partials/footer.htmland modify the top 6 lines so they read as below, theisPagecheck removes the comments from the homepage! In the future I will likely modify this so comments only appear on blogposts, which will make these instructions out of date!<footer id="footer"> <div class="container"> {{ if .IsPage }} {{ partial "foot_custom.html" . }} {{ end }} - Create a new file at
layouts/partials/foot_custom.htmland enter the following code:
<div id="disqus_thread"></div>
  <script>
  (function() {
    var d = document, s = d.createElement('script');
    s.src = 'https://visibledata-co-uk.disqus.com/embed.js';
    s.setAttribute('data-timestamp', +new Date());
    (d.head || d.body).appendChild(s);
  })();
</script>
  <noscript>Please enable JavaScript to view the <a href="https://disqus.com/?ref_noscript">comments powered by Disqus.</a></noscript>
- Before pushing your website, ensure to run
blogdown::build_site()to properly plugin Disqus! - Now your blog should work :)
Citable Author
Charlie Joey Hadley
(orcid.org/0000-0002-3039-6849)
Citable Data
No data used.
To turn off RMarkdown processing here we have to steal a trick from Yihui Xie that’s used here: https://raw.githubusercontent.com/rstudio/rmarkdown/gh-pages/authoring_migrating_from_v1.Rmd↩︎